Custom Windows
Introduction
In my ongoing quest to optimize the performance of my computers especially in relation to my PC-building and overclocking projects, I decided to explore a new avenue: customizing Windows. My primary goal was to maximize gaming performance, particularly for FPS games that demand high responsiveness and fluidity, while also enhancing graphical quality and maintaining a satisfactory frame rate.
Upon analyzing Windows' behavior, I noticed that numerous programs and tasks run in the background. These processes unnecessarily consume resources such as CPU and RAM, which could otherwise be dedicated to active games. Additionally, these Windows components frequently transmit data to Microsoft servers, using up network bandwidth and increasing ping, thereby negatively impacting the performance of online games. I quickly recognized this as an opportunity for significant, free optimization.
Exploration and Initial Attempts
Initially, I tried to remove or disable unnecessary components directly on a standard, unmodified Windows installation. While this approach resulted in some improvements, I discovered that certain built-in elements could not be removed after installation. This limitation motivated me to dive deeper into the customization process.
I discovered that it was possible to modify a Windows ISO image before installation. This method allows the removal of unnecessary components before they are even installed, enabling much more comprehensive customization. Additionally, I learned about pre-modified versions of Windows, such as Tiny10 or RevOS, which demonstrated significant performance gains. While these versions were intriguing, they didn’t fully meet my specific needs, leading me to create my own customized version of Windows.
Discovering NTLite
To customize a Windows ISO image, I used a tool called NTLite. This software allows near-complete customization of the ISO prior to installation:
Removing and Adding Components : Tailoring the system to include only what is necessary.
Pre-Setting Configuration Options : Avoiding the need for manual post-installation setups.
Registry Modification : Adjusting Windows registry settings in advance.
Driver Integration : Incorporating drivers directly, eliminating the need for manual installation after the system setup.
Adding Files and Scripts : Embedding programs or scripts to automate specific actions during installation.
For my needs, the primary benefit was the ability to remove unnecessary components, freeing up resources and enhancing performance. However, using NTLite requires a deep understanding of Windows component dependencies, as removing one element can inadvertently render others unusable.
Customization Process
The creation of my custom Windows system was carried out in several stages:
Component Analysis
I worked to understand the purpose of each component and whether it was relevant to my needs. For example, certain features like Windows Hello were essential on my laptop, which is equipped with a fingerprint scanner. However, for gaming purposes, many services could be removed to optimize performance.Testing in a Virtual Environment
Before installing my custom Windows system on my main PC, I used virtual machines (VMs) to test my modifications. This allowed me to verify performance and compatibility without risking rendering my PC unusable. Testing on VMs also saved me from having to completely reinstall the system in case of failure or unsatisfactory performance.Dependency Management
One of the major challenges was managing dependencies between components. For example, on my laptop, even with the drivers installed, the fingerprint scanner did not work without certain services tied to Windows Hello. I had to identify and retain the necessary components to enable this functionality.Creating Multiple Versions of Windows
I ultimately created several customized versions of Windows tailored to different uses: a minimalist version for gaming, with as many unnecessary components removed as possible to free up resources, and a more complete version for daily and professional use, incorporating more features and functionality.
Results and Observations
After several iterations, I developed versions of Windows that were well-suited to my needs. The improvements were significant:
System Performance
On a computer with an Atom processor and 2 GB of RAM, my custom Windows executed tasks two to three times faster than a standard Windows installation on a PC equipped with a recent i5 processor and 8 GB of RAM.Network Improvements
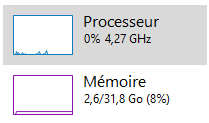
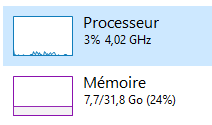
Leveraging my networking courses and tools like Wireshark, I observed a noticeable reduction in the network packets sent by my custom Windows compared to a standard Windows installation. This not only reduced network usage but also lowered online ping, resulting in improved performance in FPS games.
Why This Project is Important to Me
Customizing Windows has become a way for me to explore its inner workings while tailoring it to my specific needs. This project reflects my technical curiosity, my passion for optimization, and my ability to adapt complex tools to achieve my goals. It has also given me a deeper understanding of the interactions between the components of an operating system and how to leverage each resource to maximize performance.
Future Perspectives
This project is still evolving. I plan to explore additional customization tools and push optimization even further. I also aim to share my experiences with other enthusiasts by creating guides or tutorials to help those who, like me, want to optimize their system to meet their specific needs.